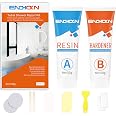
🛁 Revive Your Space with Style!
The Endhokn Bath Repair Kit is a comprehensive solution for repairing cracks, holes, and scratches in various surfaces including porcelain, acrylic, fiberglass, and ceramic. Featuring a user-friendly 1:1 mix of components and a waterproof finish, this kit ensures a professional-quality repair that is both quick and cost-effective.


P**S
Oops I dropped the hammer in the sink
Works well. Looks great. I dropped a small hammer in the sink….big divot and crack. This product is excellent. Clear directions, easy to use. Finish up sand paper was ok used some from hardware store to finish up. Looks great.
J**S
This stuff worked great
Worked great
L**U
Great product but can change color
Excellent product however if you use bleach products to clean this will change the color to yellow. I used this to fix a crack in my sink. Poured left over bleach water and it turned just the crack I repaired yellow
T**R
Tub/ shower repair
Actually works Amazing!!
S**Y
Started out great, then flaked off ***UPDTAED w response from company
I was very cautious about following the instructions on this product. Even with the poorly written English description, the basic steps were comprehensible. I applied this product, allowed it to dry for three days, and sanded it down, wiped away the debris, and then applied a 2nd coat. After three days, i sanded it down again to a smooth finish. It looked good and seemed like it would do well. A month later and the product started to peel upward and flake apart. After about two months, the entire applied amount has flaked off and washed down the drain.After posting the review above, the company reached out to me to share clarification on the instructions, as shown below; and also refunded me for my purchase. I have not had the time to re-apply, as the process takes almost a week to get two applications. I adjusted the rating from 1 star to 3 stars because of their response (i did not contact them to request anything; they took the initiative to restore good faith). I wish all companies that sell Amazon products were as proactive about maintaining good customer relations and improving their product instructions.[company response]I am very sorry to receive your feedback. After mixing the bathtub repair kit 1:1 evenly, wait for 24 hours for it to solidify. Then, for any spilled parts, we recommend using stickers to protect the surrounding area before use. After the repair is completed, remove the stickers and clean up any residue that spills outside the stickers in a timely manner. This can greatly avoid damage to the repaired surface caused by polishing. In addition, after application, a scraper can be used to help smooth the surface. On the one hand, it can promote penetration and bond more firmly. On the other hand, it can obtain a smooth surface without the need for further polishing. Because we know that if the polishing is not thorough enough, the glaze will be damaged, making it easy to be stained and accumulate stains. If the surface is polished smooth enough, it means that the cured bathtub repair paste may have been polished to a minimum, and the adhesion will decrease at this point. If the area is frequently washed away by flowing water, the already thin surface will become more fragile, leading to peeling.Therefore, in areas that are frequently washed away by flowing water or affected by external forces, it is recommended to apply as thick a coating as possible, as this area has a higher frequency of use than other locations and is more prone to secondary damage. At the same time, we will also provide a full refund. For the remaining products, you can try again according to our suggestions and do not need to send them back to the Amazon warehouse.
E**Y
Very satisfied
Very easy to use and fixed the hole in my tub completely, and cost-effective at that! You can even look up a video that walks you through the process step by step.
A**R
Works Well
This worked well to patch a hole in the bathtub. Prepping the surface was key and not using too much of the epoxy mixture worked best. We had to repeat the process as the first time, we used too much and the patch didn’t hold. We re-did it with much thinner layer and it worked fine. It is tricky to use as you have a time limit so getting everything organized before you start helps.
C**E
Approach this job mindfully
It seems I didn’t take time to learn the details carefully. Don’t do what I did! You’ll end up frustrated and starting over like I did. Hints for the 1st try: 1) The written instructions and video differ on applying the stickers. Ignore the writing about scraping the sticker area with a tool; follow the video! 2) I wrestled with the stickers until I realized there’s a pre-scored fold on one edge to help remove it. Duh. 3) If you fold a small piece at one corner of each sticker before applying it, it’s much easier to remove. 4) Careful with that lid, Eugene! When I unscrewed the first, a line of goo oozed out all over. I recommend a paper towel underneath for all steps involving goo. 5) Less is more. Initially I squeezed a lot of goo from each tube, but you really don’t need much, even if you have several gacks to repair like I did. Less of a mess. So…having learned all this from my 1st spastic attempt, the 2nd try was a walk in the park. I’m so smart. 🤣 Good luck!
Trustpilot
1 month ago
3 weeks ago